I had bought a cd from Crafty Catz back in October last year at the SECC hobbys and handicrafts show and well you know how it is, you use it for bits and pieces and never really get the chance to play properly. So over the Christmas period I got to play a bit more with the cds I own and decided to make some pieces using the owls. Here is one of them I made for a 40th card. I sent pics to the designer of the cd and she loved it, so hey Im delighted to say I am now officially a sample maker for Crafty Catz cds and stamps, woohoo or should I say twit twoo!
Tuesday, 1 February 2011
card for my father in law from the kids
We set out to make a card for my father in law from my kids. They call him papa which is what he likes so I had to put 'Papa'on the front of the card although I prefer granda or granpa. They wanted glitter and stickers and shiny shiny bits so my three year old told me but I had to draw the line somewhere. The card is a compromise between my creativity border and their wishlist.
I used Nestabilities to create the main shape of the card and simply scored them both 1 inch in and glue them together to create the card. Then I used smaller nesties to create the layers. The stamp is ELZYBELLS birthday bears and the inside is simply glitter girls peel offs with sparkly stars on them. Then instead of an insert I simply stamped 'you are a star' inside to create a background instead of a verse.
Quick and simple but the kids and 'papa' loved it. Job Done!
I used Nestabilities to create the main shape of the card and simply scored them both 1 inch in and glue them together to create the card. Then I used smaller nesties to create the layers. The stamp is ELZYBELLS birthday bears and the inside is simply glitter girls peel offs with sparkly stars on them. Then instead of an insert I simply stamped 'you are a star' inside to create a background instead of a verse.
Quick and simple but the kids and 'papa' loved it. Job Done!
Thursday, 27 January 2011
my roses tutorial
Hi there
A couple of weeks I was asked how I had made the roses for the wedding last summer and I tried to explain the process in a few picture and instructions.
I then was asked if I would show them on a little video and whilst I havent said a word on this I did however take a very short video of my fingers making a quick rose to show you the basics of how it is done.
I posted the video on lets craft on facebook for all my fellow crafting friends to see but here it is in case you fancy trying your hand at making these roses.
Go on you know you want to see if you can do it :o)
They are very simple, after all I made over 3500 for the wedding ;p)
A couple of weeks I was asked how I had made the roses for the wedding last summer and I tried to explain the process in a few picture and instructions.
I then was asked if I would show them on a little video and whilst I havent said a word on this I did however take a very short video of my fingers making a quick rose to show you the basics of how it is done.
I posted the video on lets craft on facebook for all my fellow crafting friends to see but here it is in case you fancy trying your hand at making these roses.
Go on you know you want to see if you can do it :o)
They are very simple, after all I made over 3500 for the wedding ;p)
Sunday, 16 January 2011
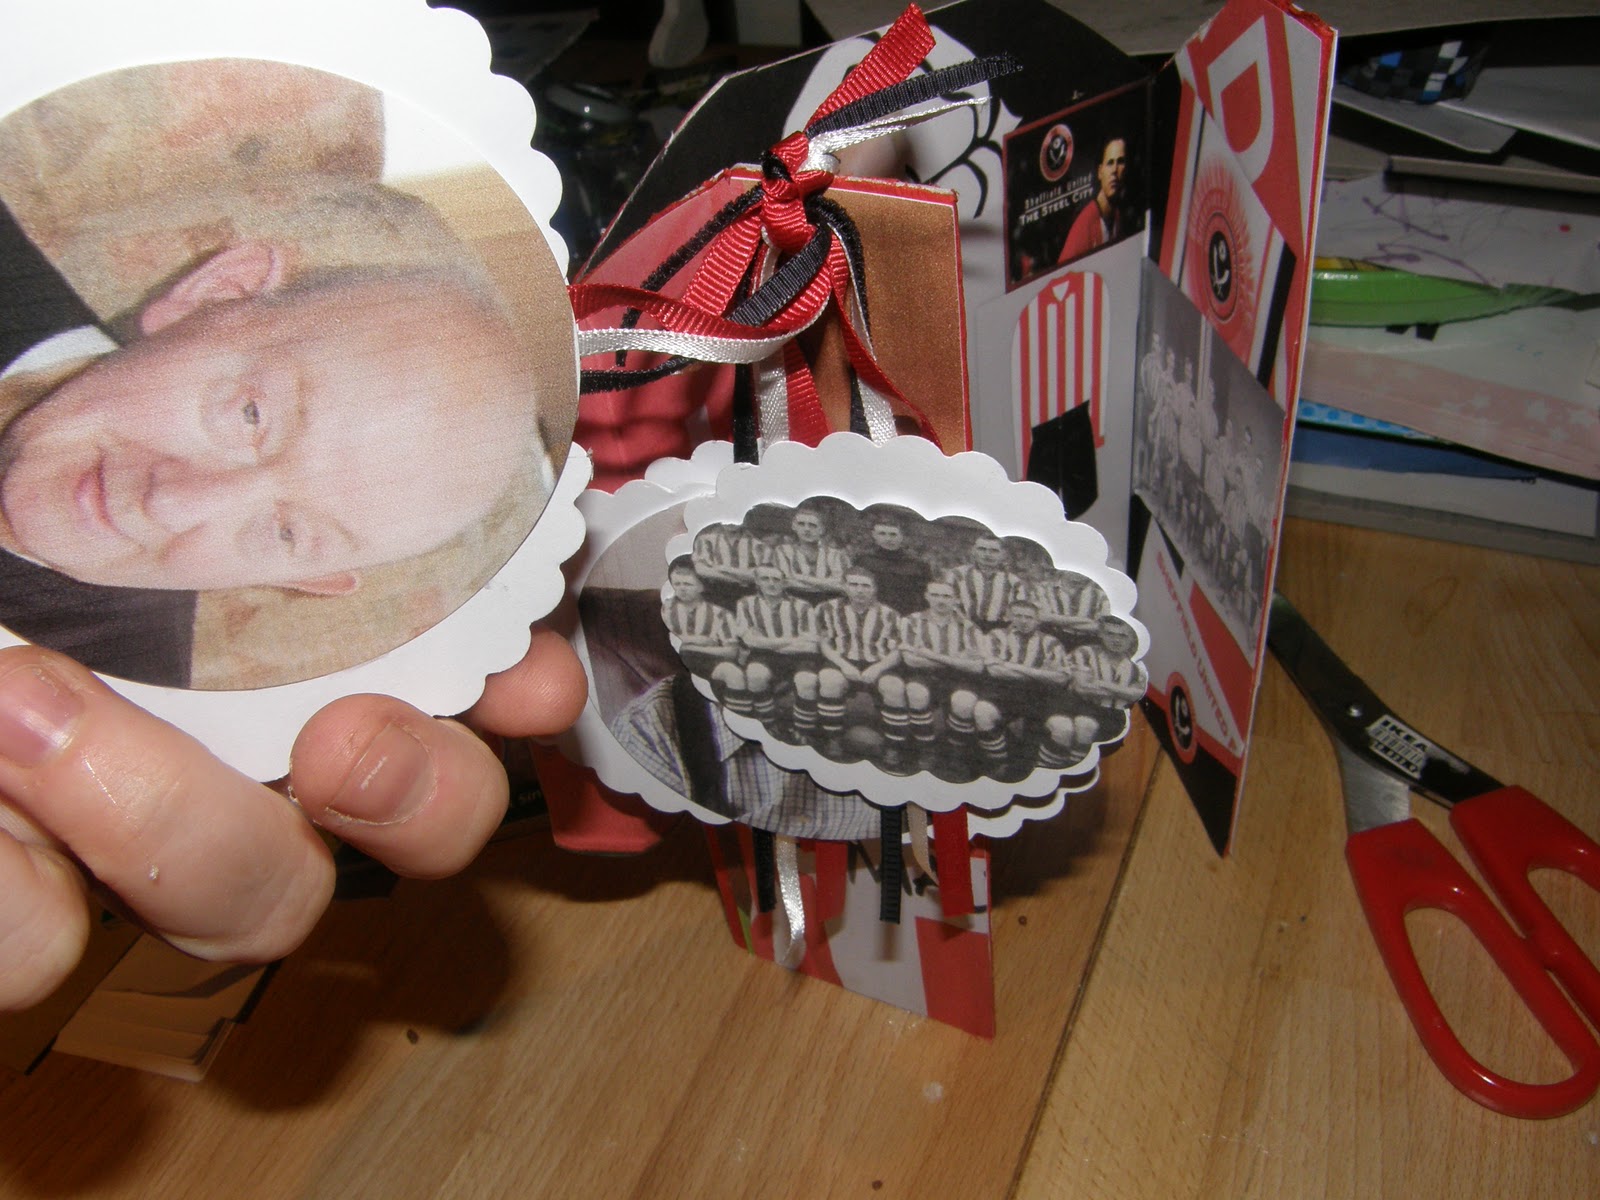
sheffield united birthday card, made by request
I was asked if I could come up with an 80th birthday card for a man who was a serious lifelong Sheffied United supporter. I thought ok lets give it a go.
I checked out the strip the year he was born and then I found out a bit about the history of the club and found out they had been in the FA Cup Final so I got a picture of that strip too. I made a small tag from the two strips and I got a metre of red white and back ribbons to make the tag hang loose. Using a copy of the team badge I made a rosette from crepe paper and the printed badge which I cut using a 'huge' circle punch. I covered a plain white a5 envelop with plaited crepe as well to create a kind of 3d effect too and ayered the rosette and tag onto the envelope adding a small rectangle with silver n red inked edges for the name to be added.
The card itself I cut using the cricut and some 100mic grey board to make it super sturdy to hold plenty of embellishment and to stand up like a footie strip. I used pics of the recipient and their strips over the years along with club memorabilia and pics of the mascot and team logo etc to make a collage for the inside of the card.
Then I punched 6 scalloped circles and layered somepunched circle photos to make tags that hang down the front of the card for memories of things achieved by the club.
A photo of the recipient, a photo of the FA cup team, a photo of the team the year he was born, and a photo of the team mascot, and one of a classic subbuteo game featuring the Sheffield United team. I layered the two scalloped circles slightly overlapping and laid the photo circle on the top centre to create an oval embellishment. I hung all of these on the three ribbons which are team colours and then finally the back was another digital image.
I took a heart sweetie from a branded name moulded into a heart shape and added the nickname of the team and then the recipients surname and age in a banner on the back. Digital workshopping is not my thing but I thought id give it a try to save me cutting lots and lots of strips of red and white card to make the strip.
I wasnt completely satisfied but then I made it so Im never happy with anything I make. However the person who requested the card thought it was 'absolutely brilliant' so that is enough for me.
Job Done another happy card recipient :o)
mural on my daughters wall -she is a big MJ fan and is a dance-aholic!
My daughter asked me if I would consider trying to draw Michael Jackson on her bedroom wall. I wasnt convinced I was up to the challenge but I thought nothing ventured nothing gained. I printed off a picture that she liked and took it up to her room. I gridded the picture into manageable squares and drew similar but obviously larger lightly pencilled squares onto her wall that I could easily rub off when I was ready to paint.
Anyway this is how it turned out, do let me know what you think.
Subscribe to:
Posts (Atom)